
Ever since I learned to swirl two frostings together for my mudslide cupcakes, I've been daydreaming about making some cute cupcakes in cones that would look like they had chocolate and vanilla swirl soft serve on top. It was my friend's birthday this weekend, AKA a perfect excuse to give these a try before summer is officially over!
I know funfetti is always a huge hit, so I decided to make homemade funfetti cupcakes to go along with the ice cream/sprinkle theme I had in mind. Here's the recipe!
Funfetti Cupcakes (in cones)
Original recipe from Crazy for Crust, adapted to be in cones
MAKES 15 CUPCAKES
Ingredients:
1 1/2 cups all-purpose flour
1 teaspoon baking powder
1/2 teaspoon salt
1 stick butter, melted
1 1/4 cups sugar
3 large eggs
1 tablespoon vanilla extract
3/4 cup buttermilk (or combine 3/4 cup milk + 1 teaspoon white vinegar and let sit for 5 minutes)
1/2 cup rainbow sprinkles
15 soft serve cones
Directions:
Preheat oven to 350 degrees. Melt the butter in the microwave and mix in with the sugar, eggs, vanilla, and buttermilk. Add the flour, baking powder, and salt. Once everything is mixed, add the sprinkles.

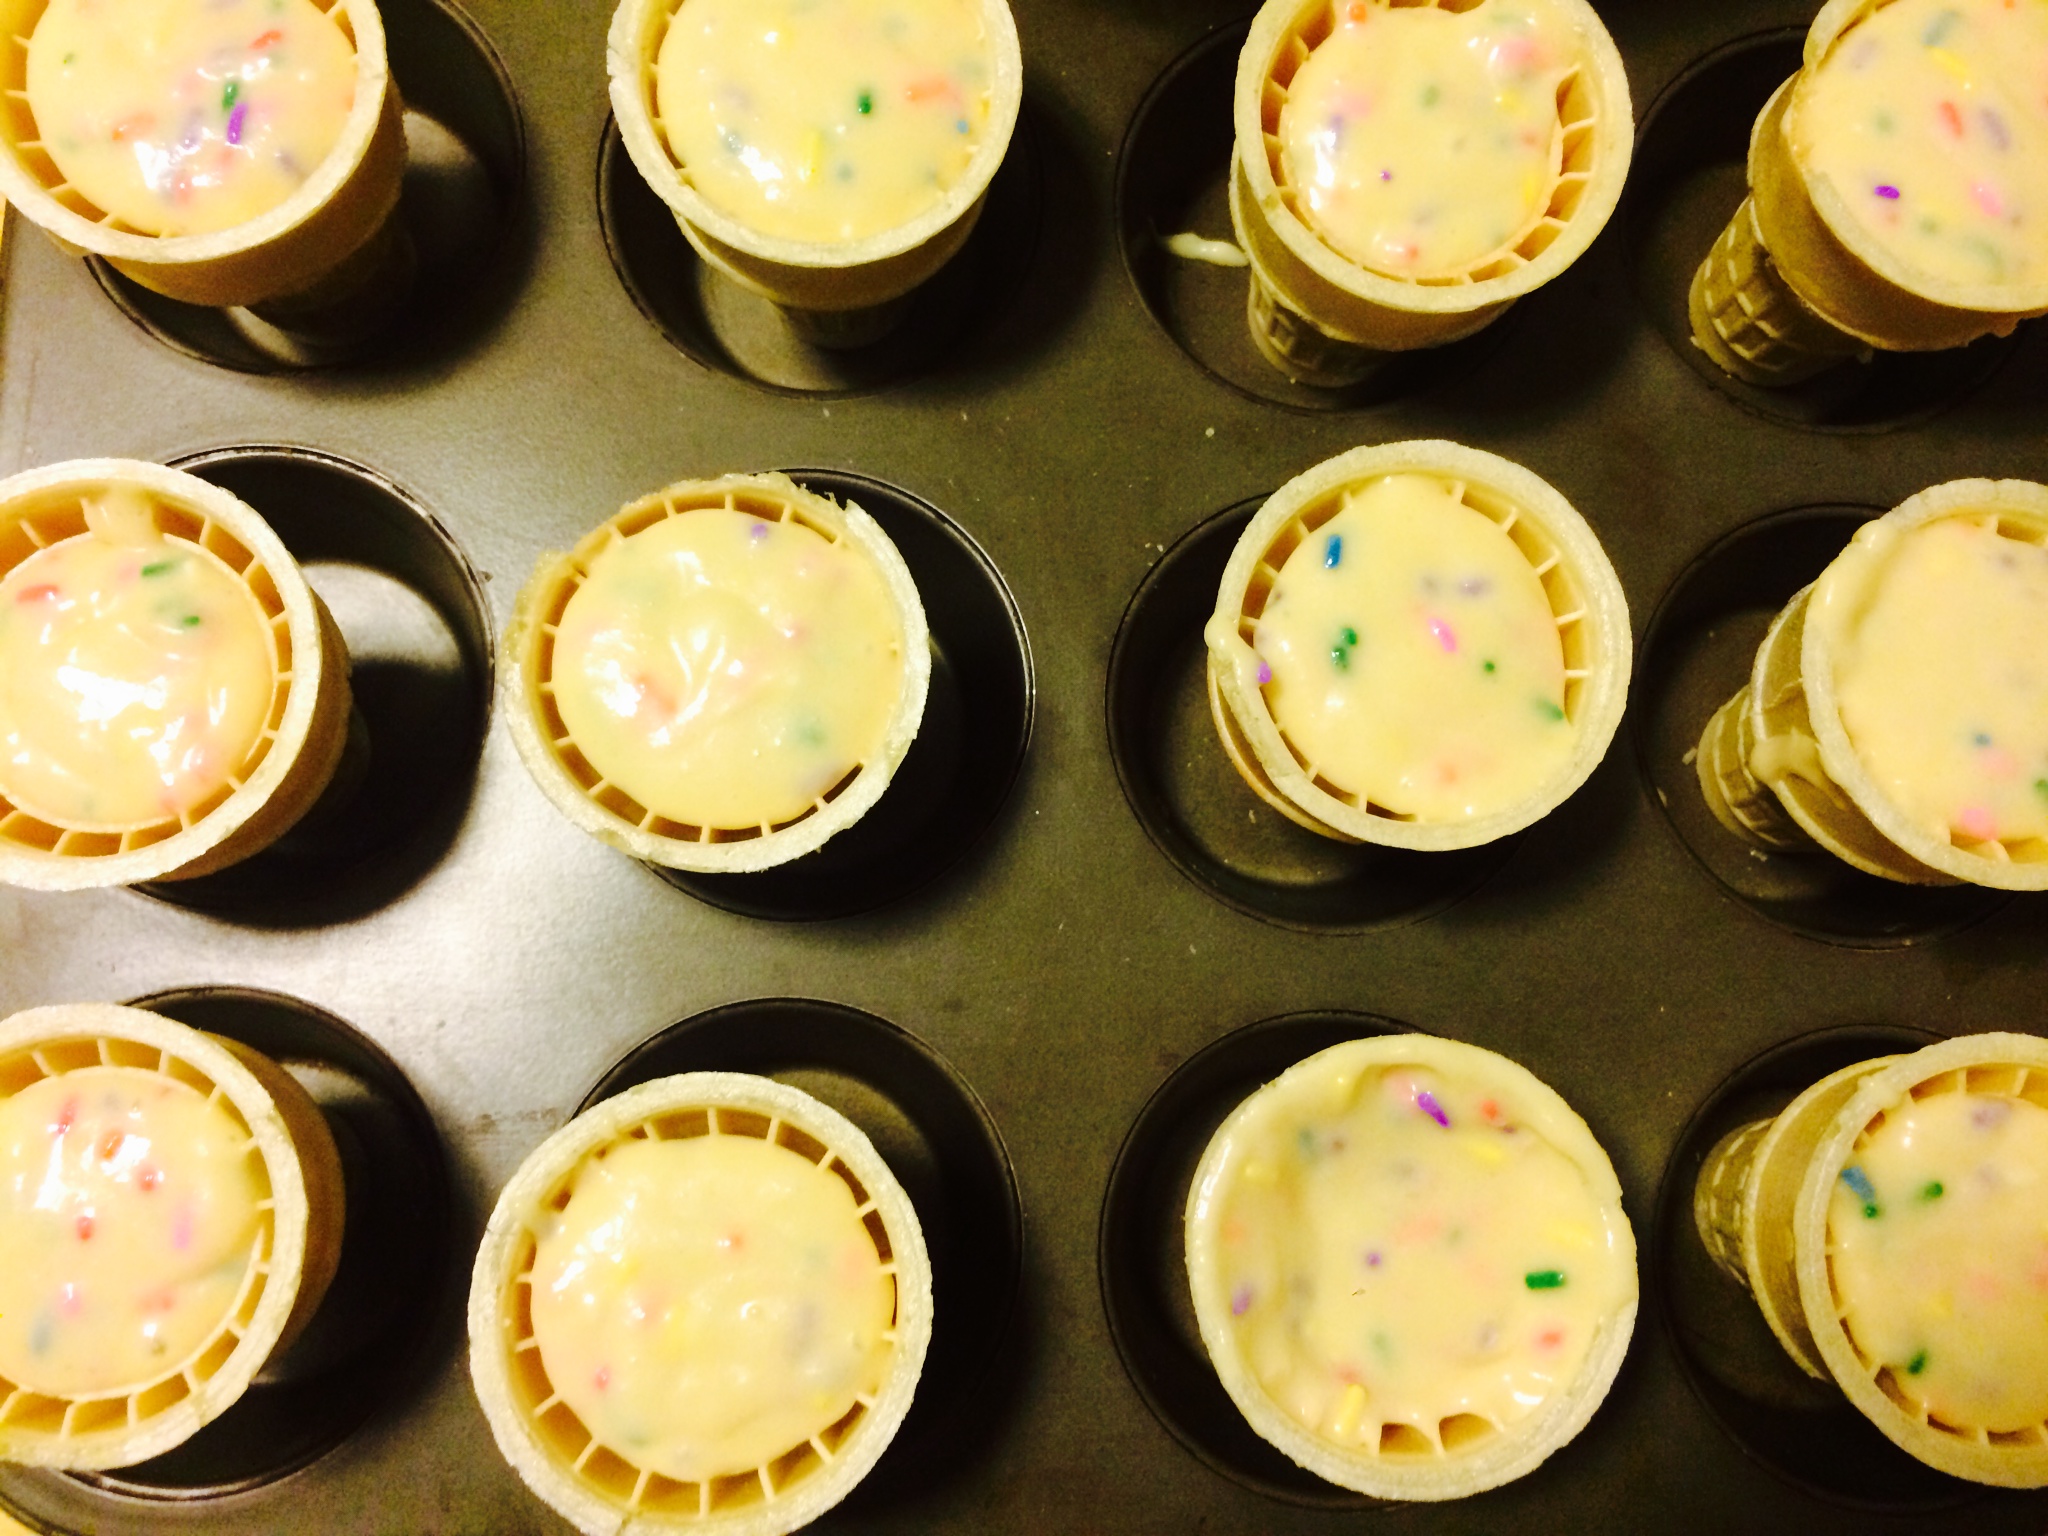
Fill each cone just above the first rim and place in a cupcake pan. Filling the cones is super easy because you can hold each cone over the bowl and scoop some batter in, then place the cone on the tray to avoid the usual messy dripping that can happen when filling standard cupcake liners. Be careful to fill them neatly without dripping on the sides or rim, or else that part of the cone will burn.
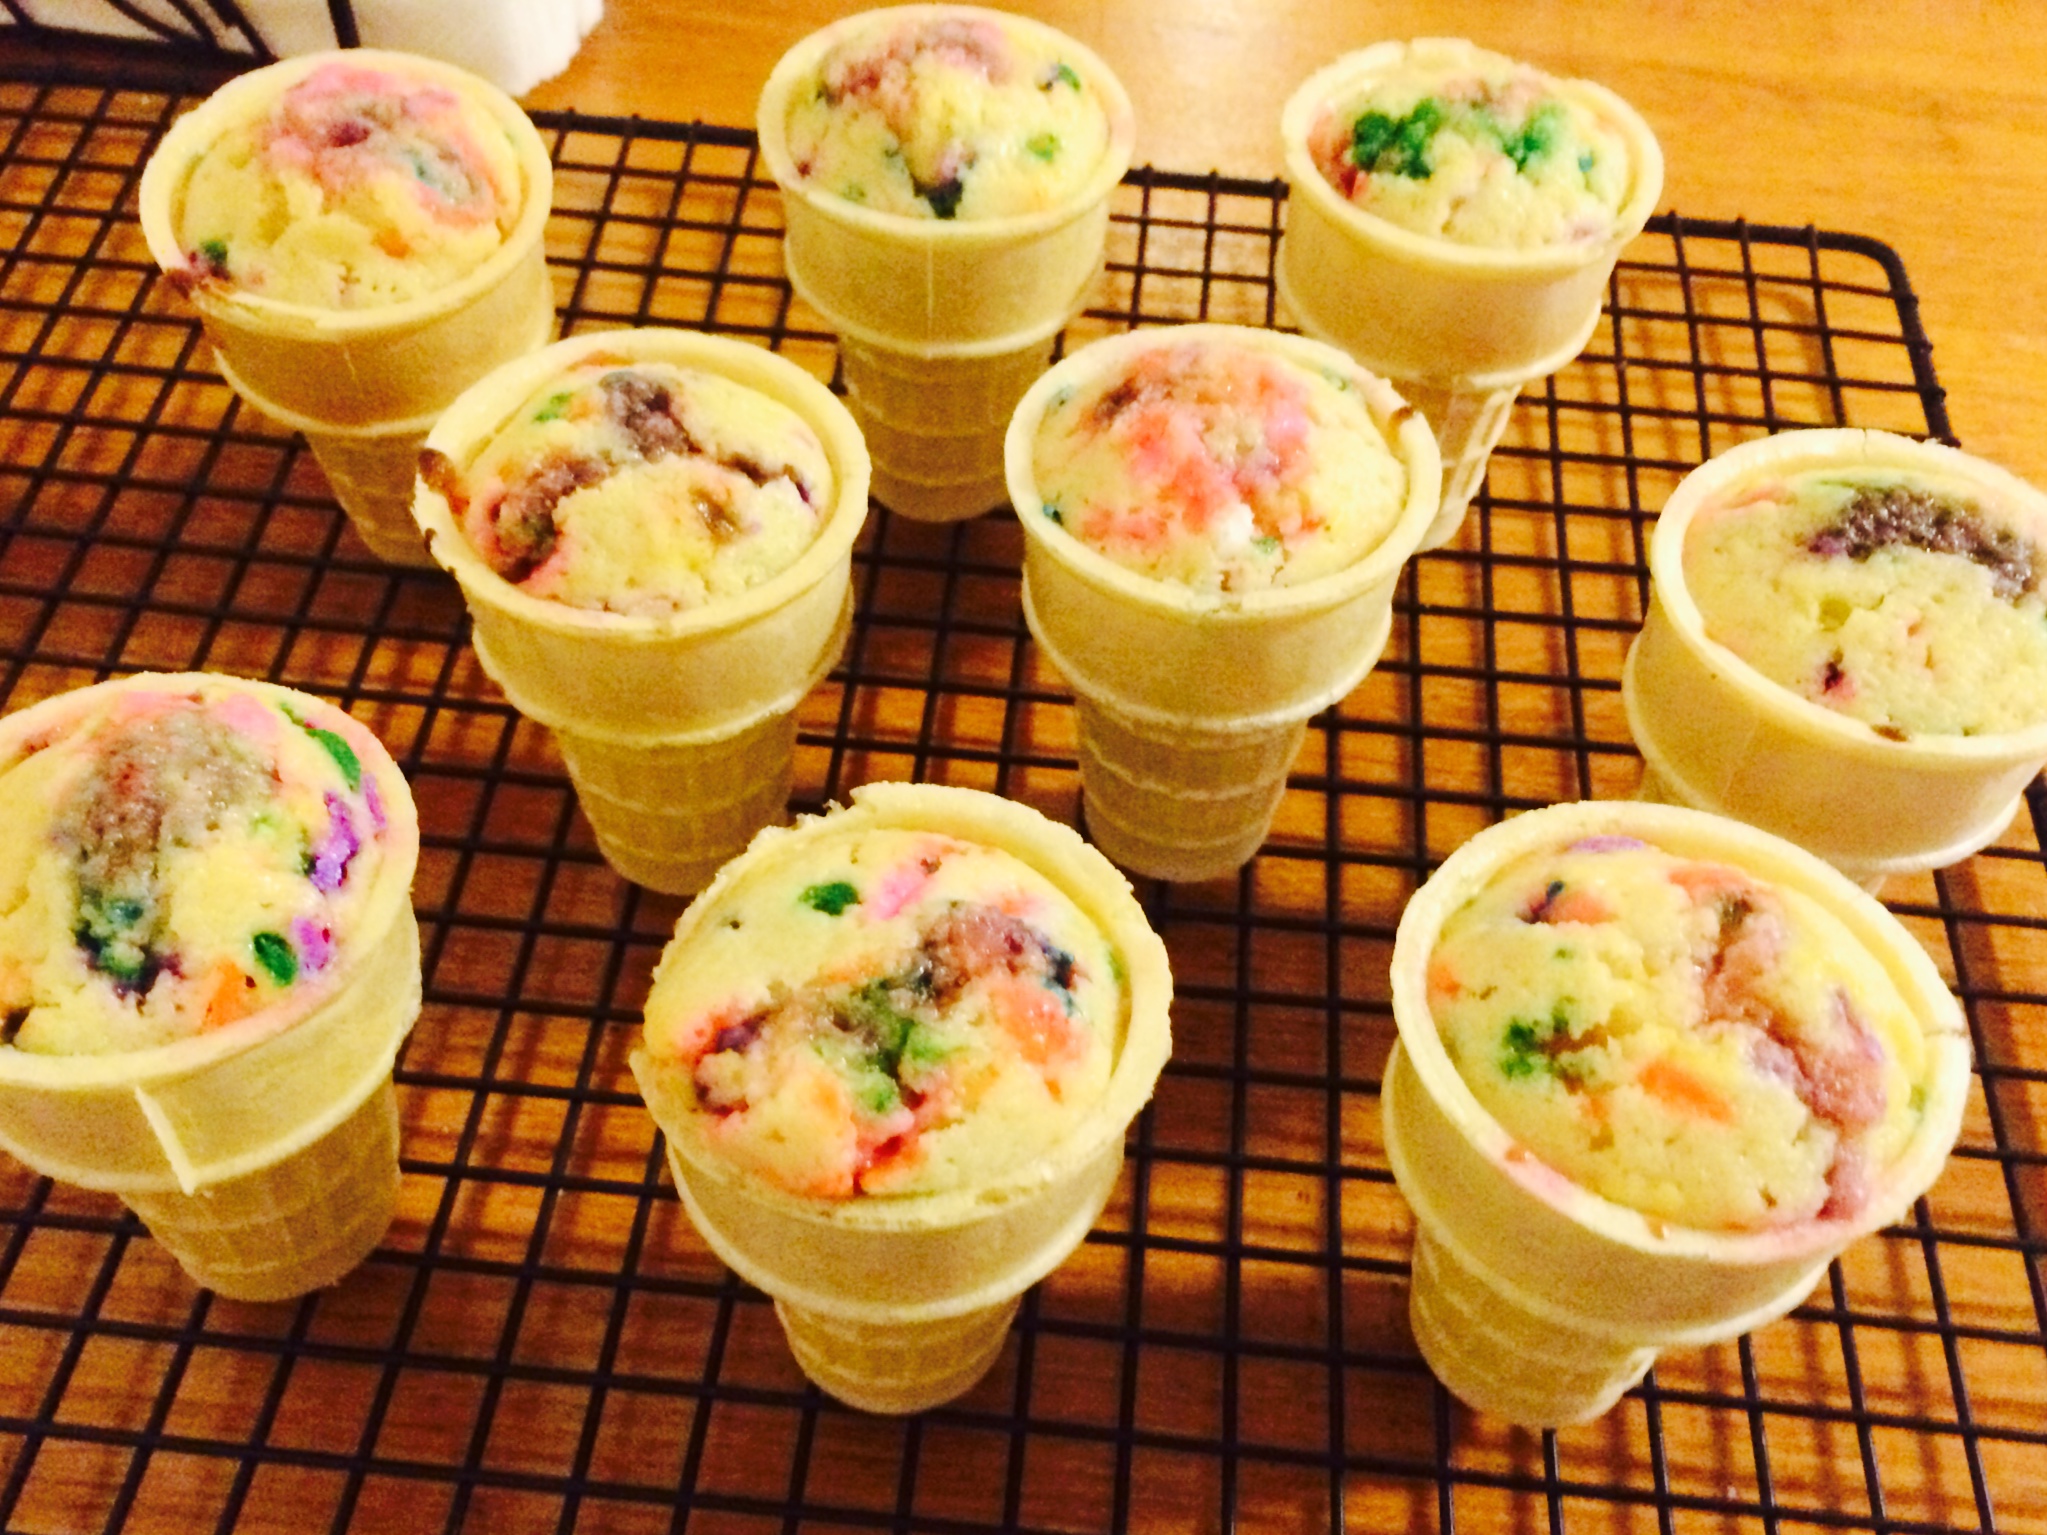
Bake for about 20 minutes until a toothpick comes out clean. It might take a bit longer than usual for the cupcakes to bake completely through, but remember that the stem of the cone is thinner, so there's not much in there to bake. If the tops are a little moist, you can still remove them - the cake continues to bake a bit as they are cooling! Mine ended up taking about 22 minutes.
Once they've cooled, frost them using this swirling technique.
Chocolate and Vanilla Swirl Frosting
MAKES ENOUGH TO FROST 15 CUPCAKES
Ingredients:
3 sticks of butter, room temperature
4 1/2 cups confectioners sugar
1 tablespoon vanilla
2 tablespoons heavy cream
1/4 cup cocoa powder
Rainbow sprinkles
Chocolate sprinkles
3 pastry bags (2 small and 1 large)
Directions:
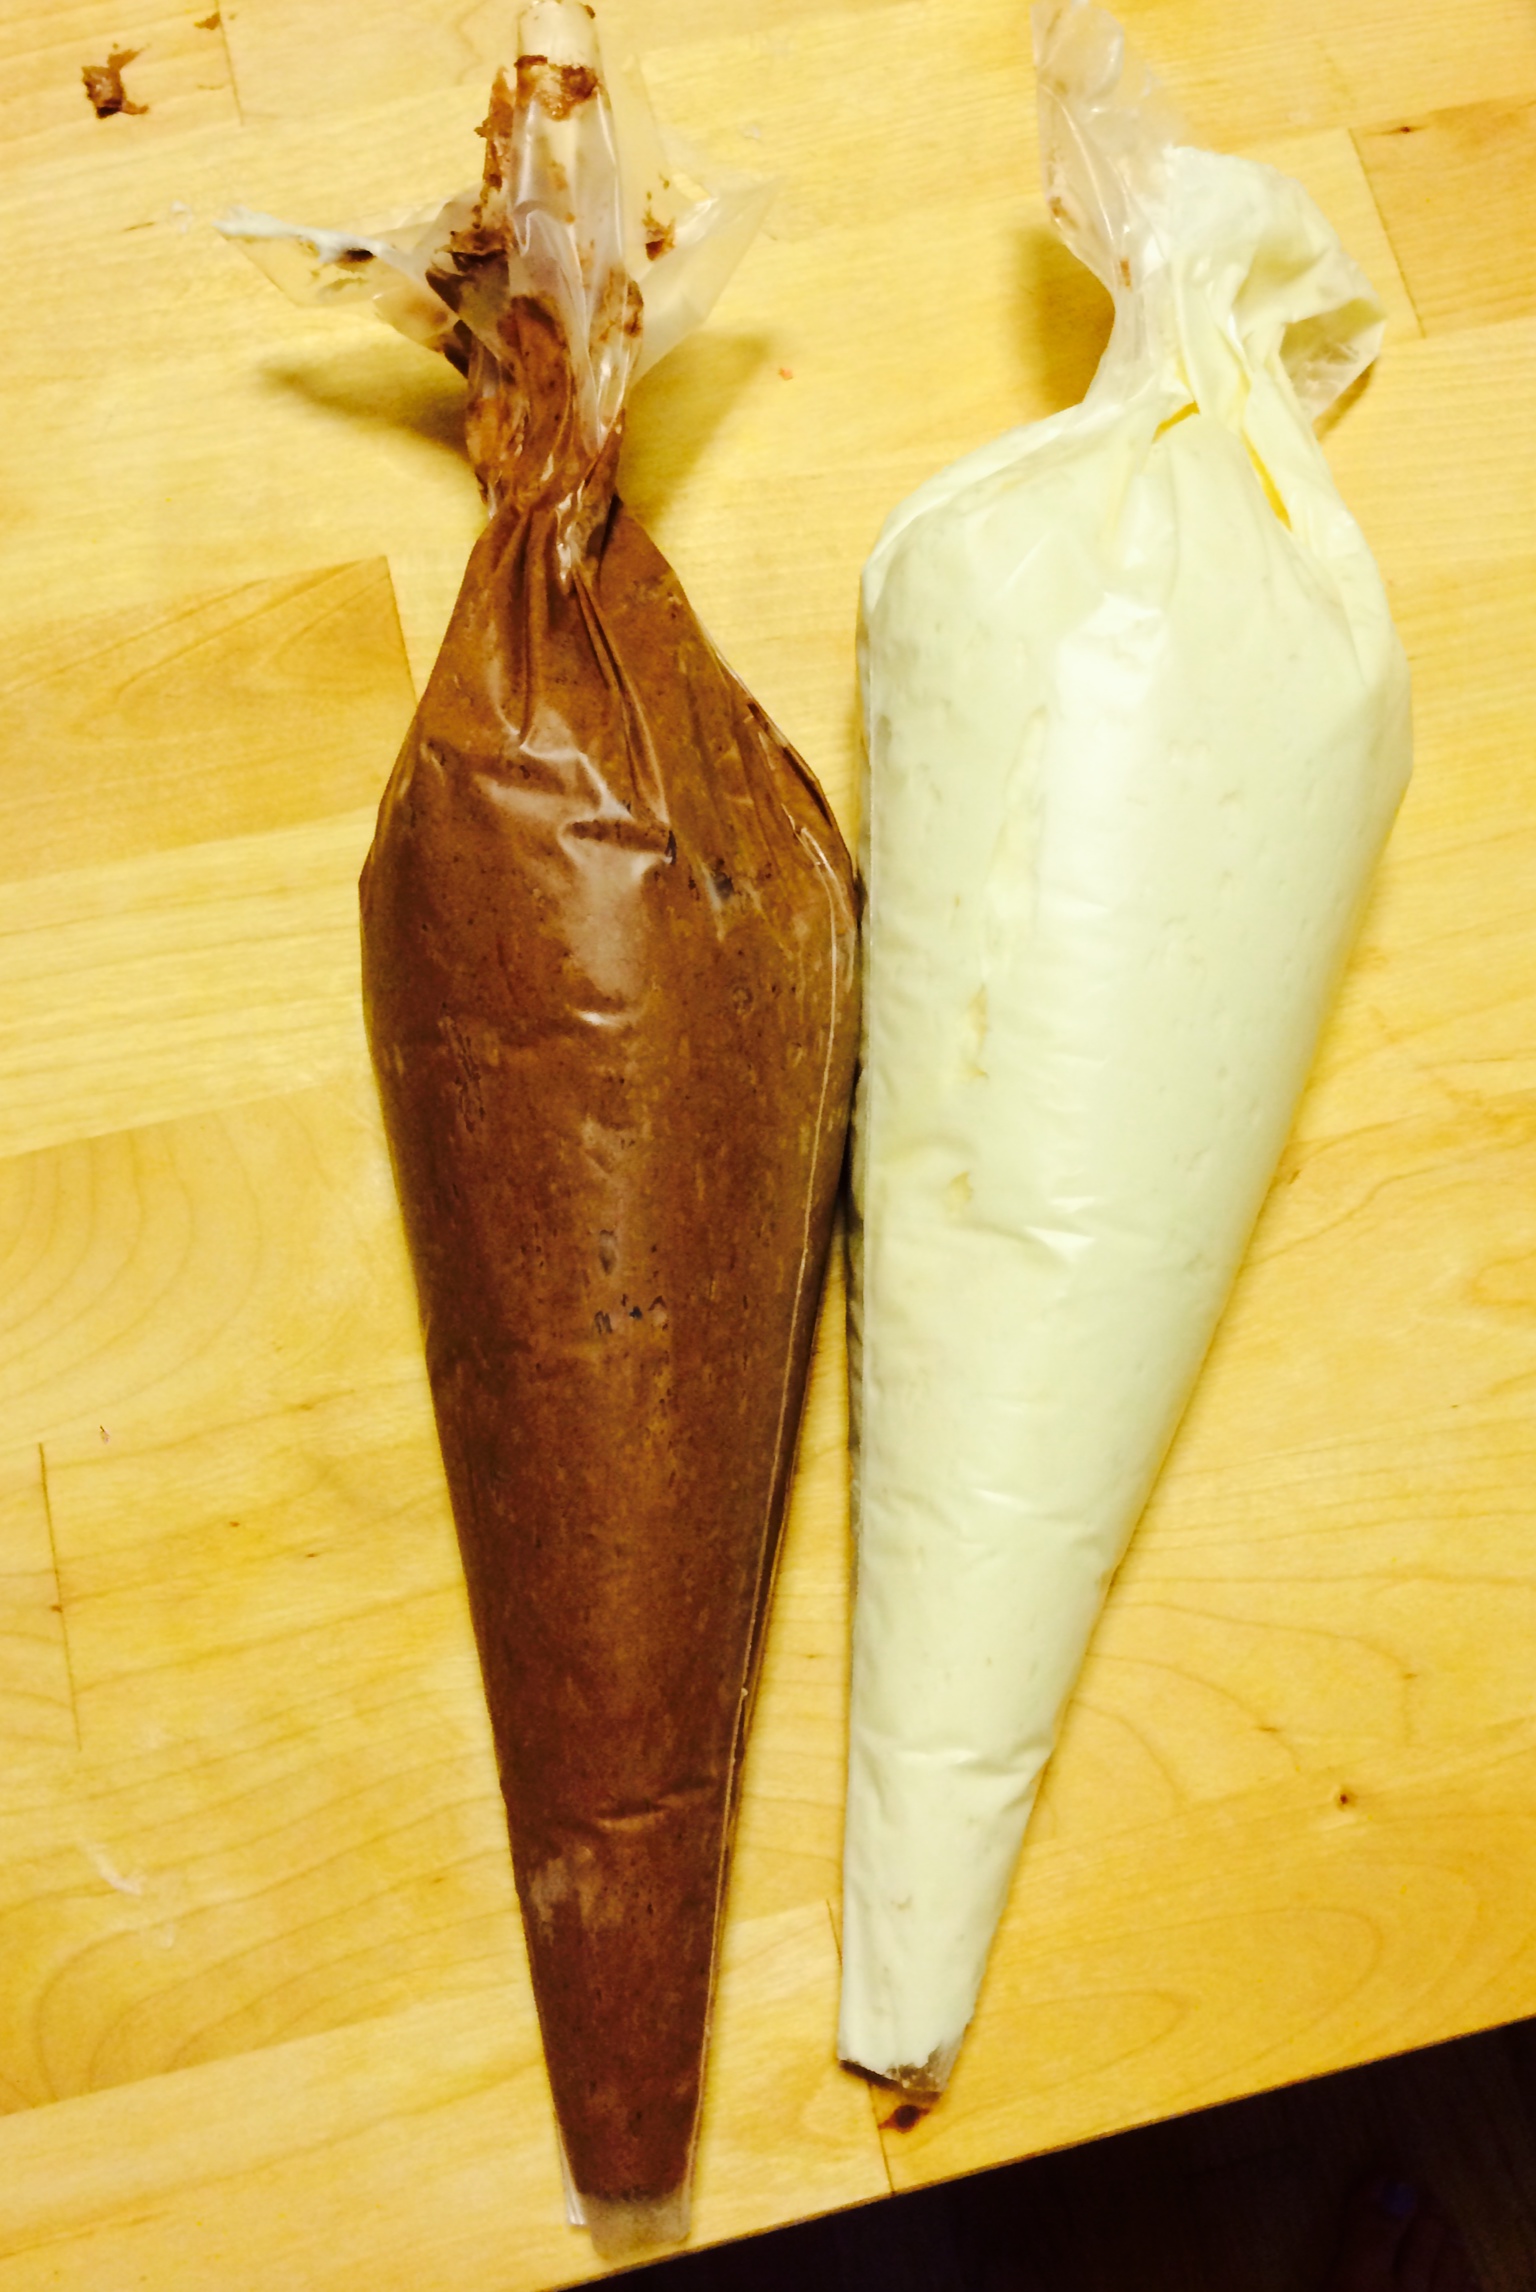
Note before we get started: I made the frosting base all in one bowl, then split it up to make half chocolate and half vanilla. This makes it less work and ensures that the consistency is the same for both batches!
Combine the butter, confectioners sugar, vanilla, and heavy cream until it has a firm frosting texture. If you feel the need to add more confectioners sugar or heavy cream to get the consistency right, go for it!
Split the bowl into two equal bowls. Leave one alone - this is your vanilla frosting. In the second bowl, add the cocoa powder and mix to get your chocolate frosting.
Scoop the two frostings into separate pastry bags. I like to use disposable plastic bags for this part, like Wilton Disposable Decorating Bags. Squeeze the frosting to the bottom of the tube so it's ready to go. If the tips of the bags aren't open already, snip them off.
Once you have the chocolate and vanilla bags ready, prepare a large decorating bag by placing a tip in it. I used a Wilton 16 inch featherweight bag and a 1M star tip.
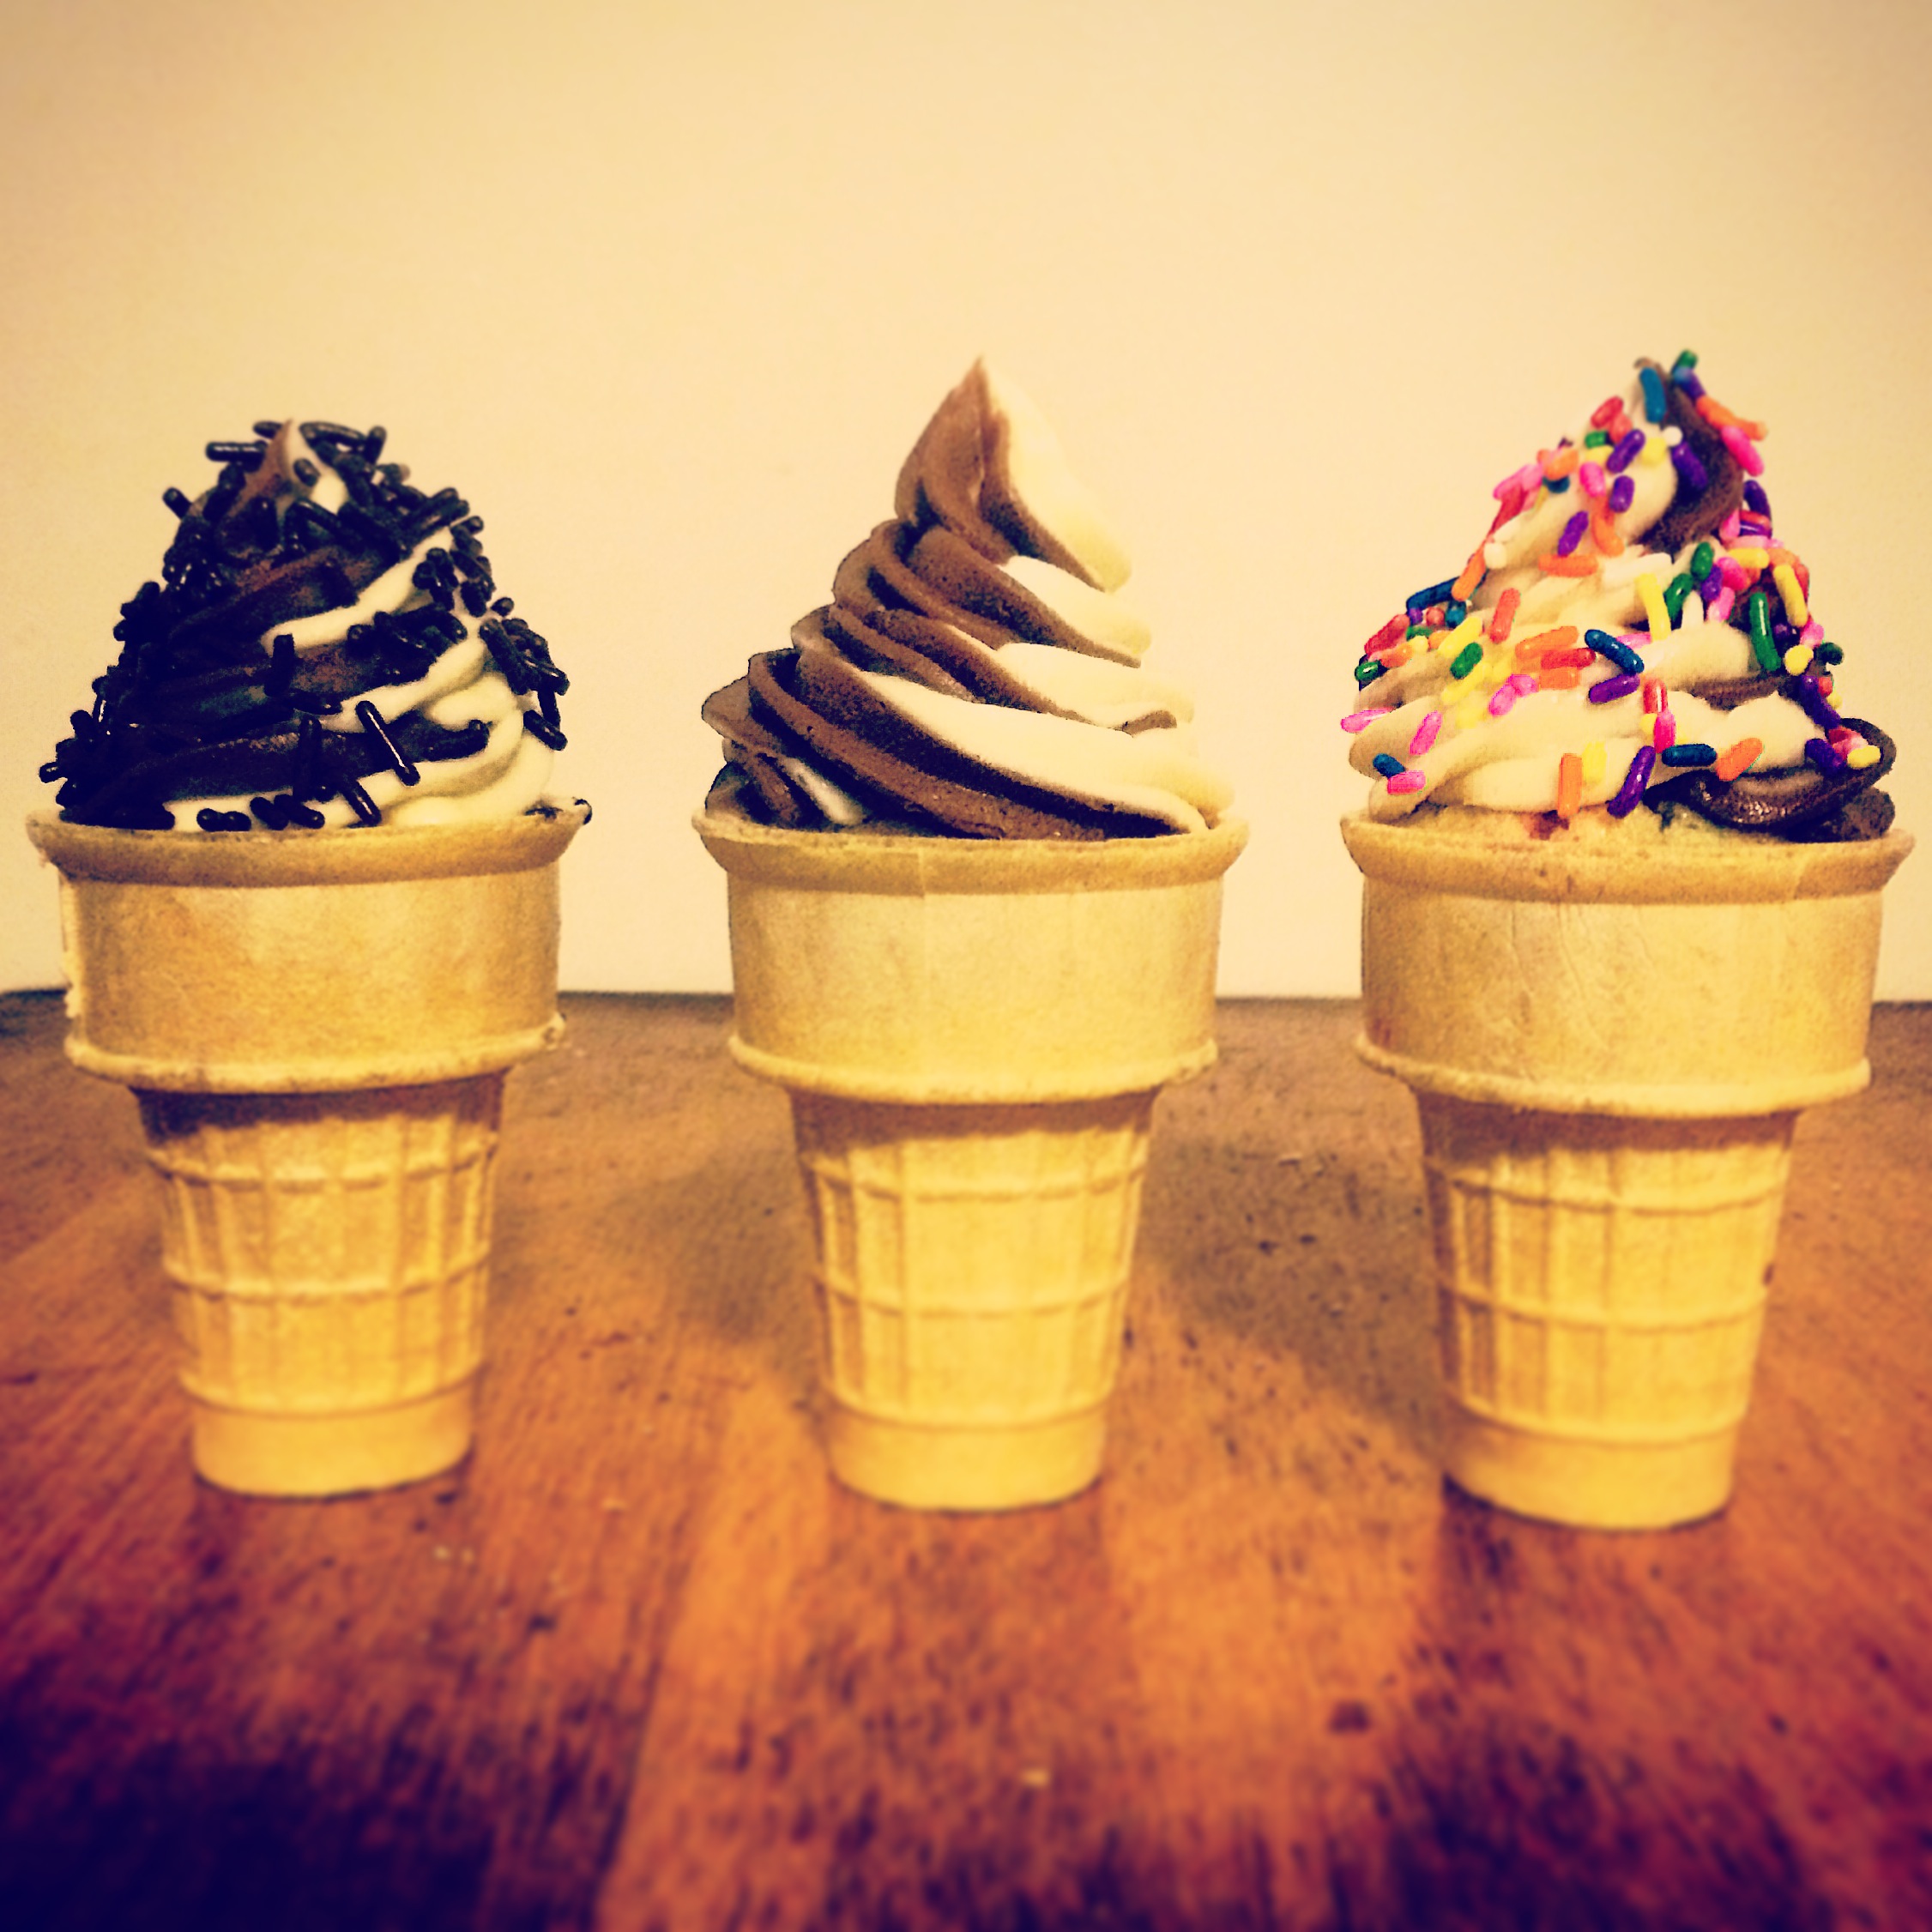
Place the chocolate and vanilla bags side by side inside the large bag that has the tip inserted. This way, the frostings won't mix together completely and will make an awesome swirl effect when you frost! Here's my technique in action:

I left some of the frosting plain, covered some with rainbow sprinkles, and some with chocolate sprinkles. Aren't they the cutest things ever?

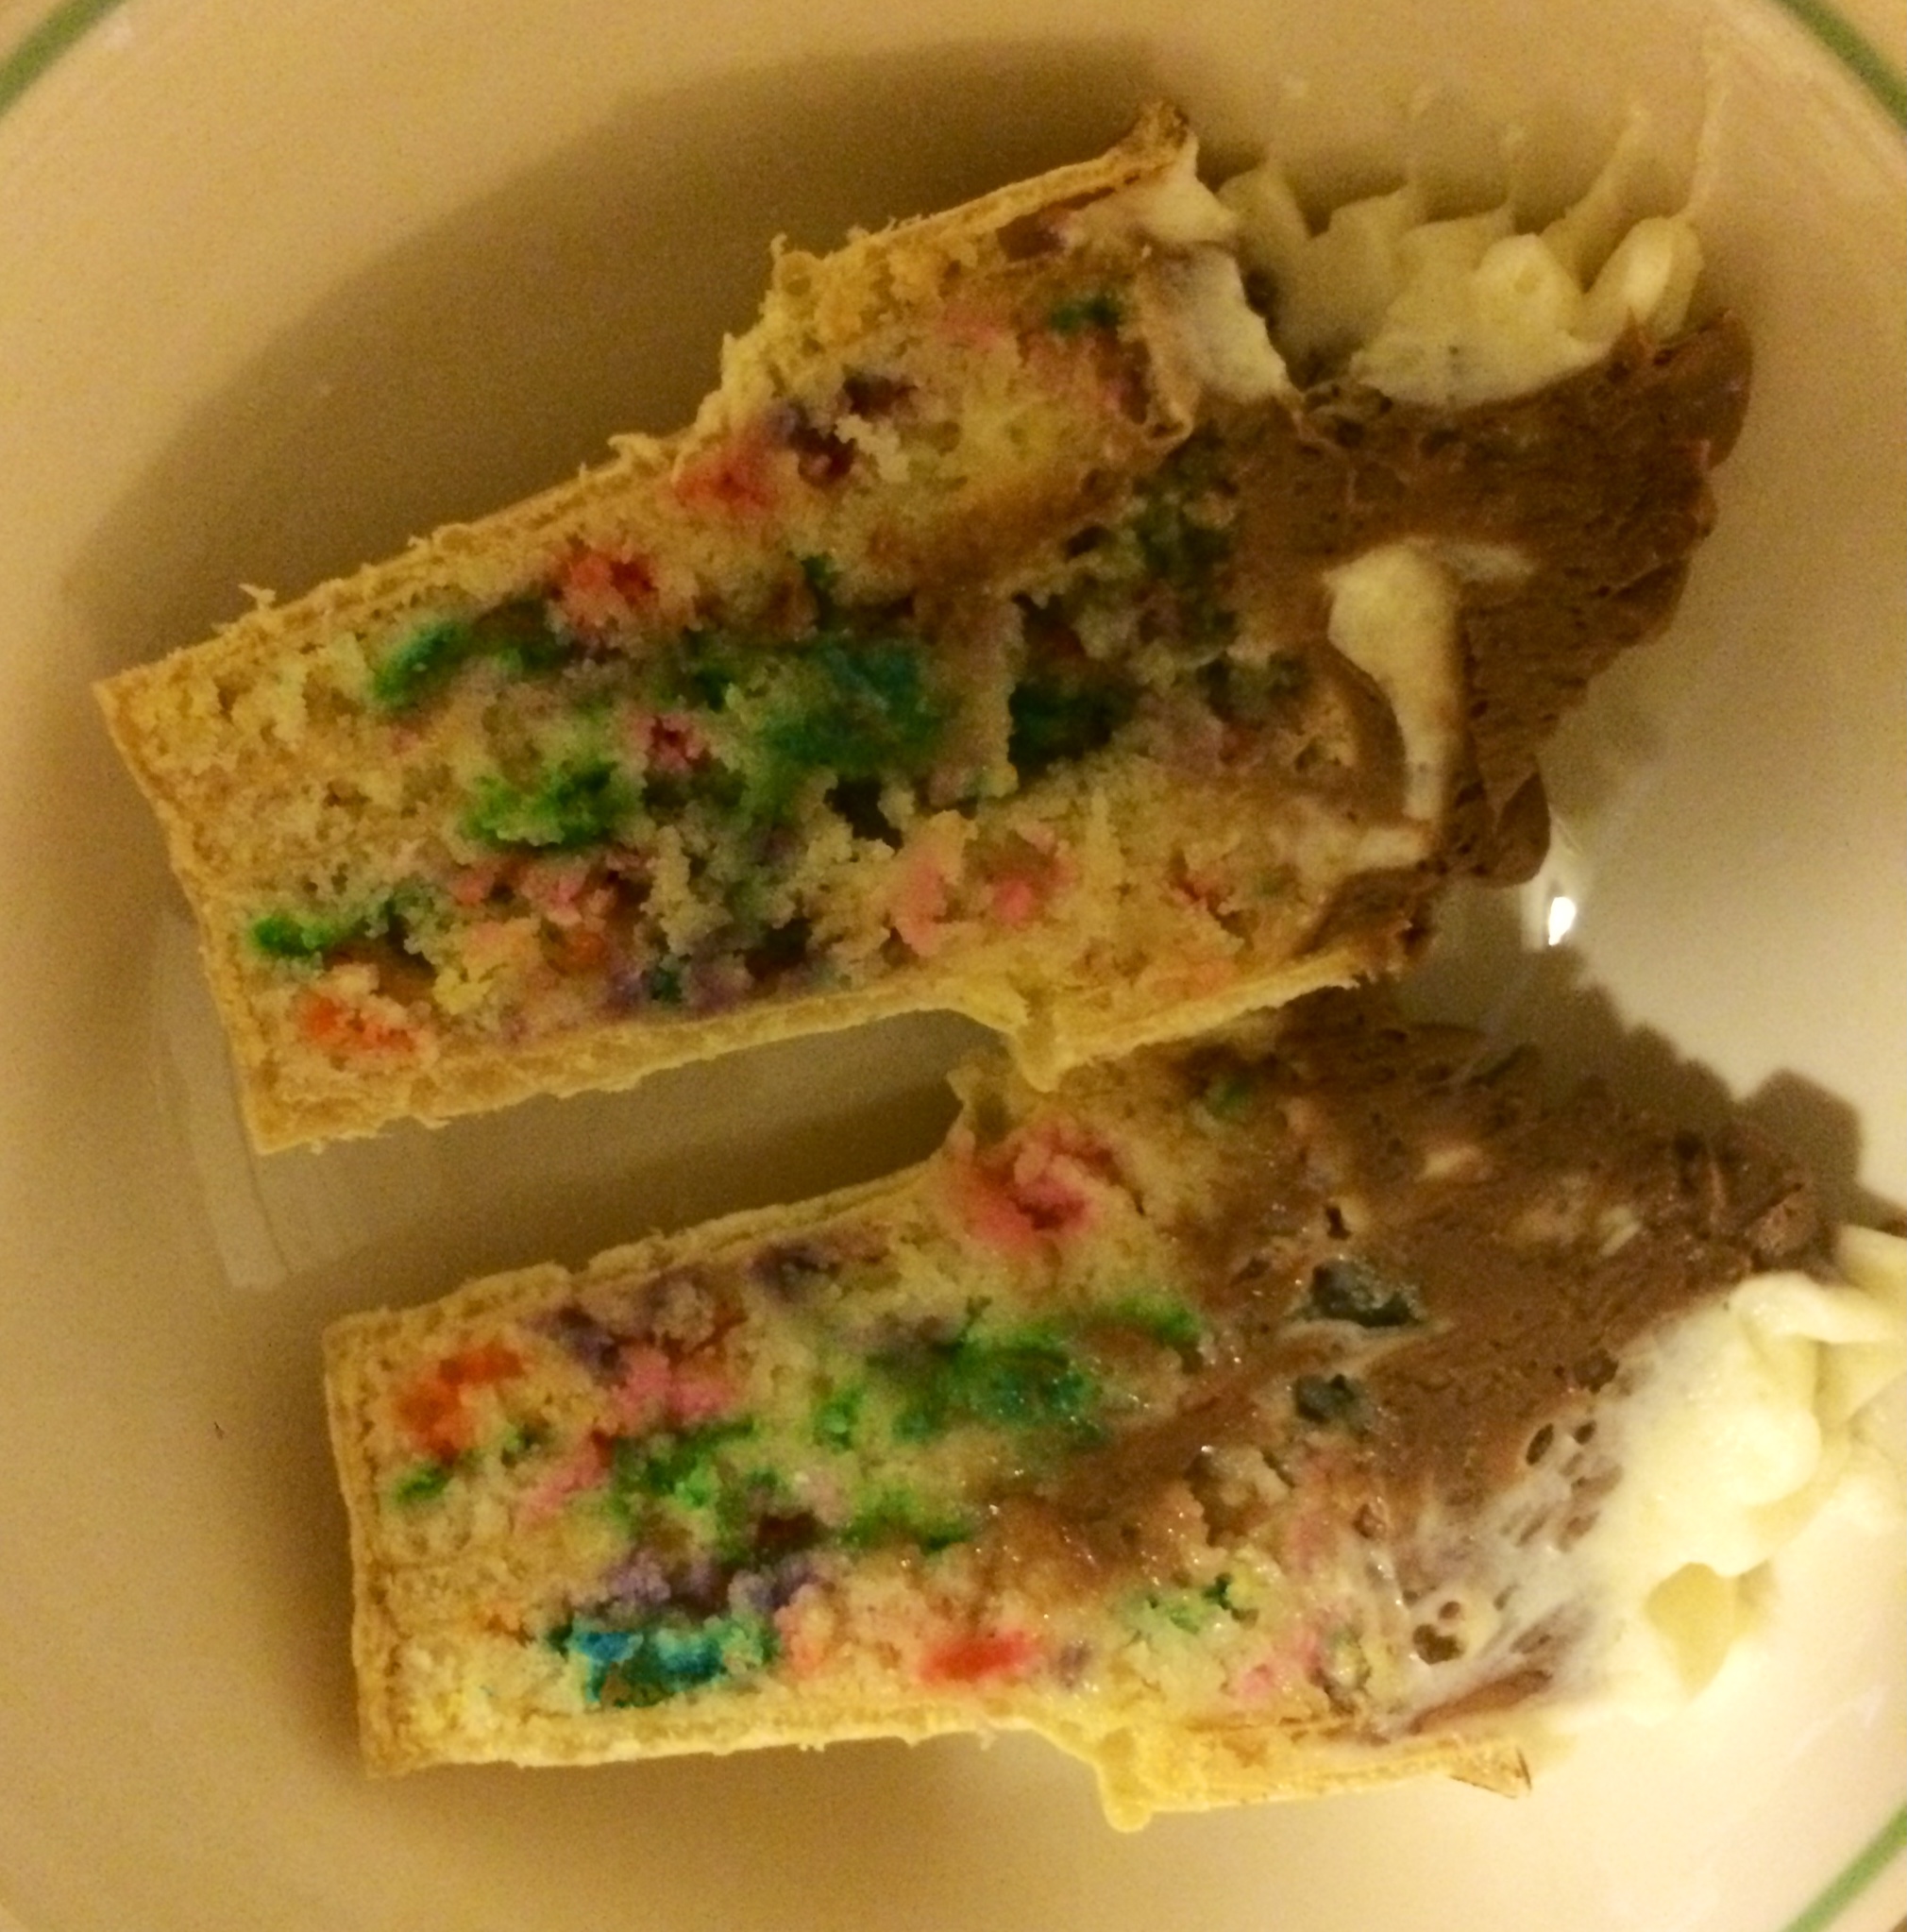
Here's a crossection. As you can see, the inside baked through perfectly!
Pro tip: to transport these, I piped a dab of leftover frosting into each cupcake spot in a cupcake holder, then put the cones in. This way, each one was secured down with a little bit of frosting, so I didn't have to worry about them shifting or tipping on my way over.

I'll definitely be making these again - they're so cute, easy, and tasty, and were enjoyed by all!